Easy Peel & Stick Wallpaper Installation
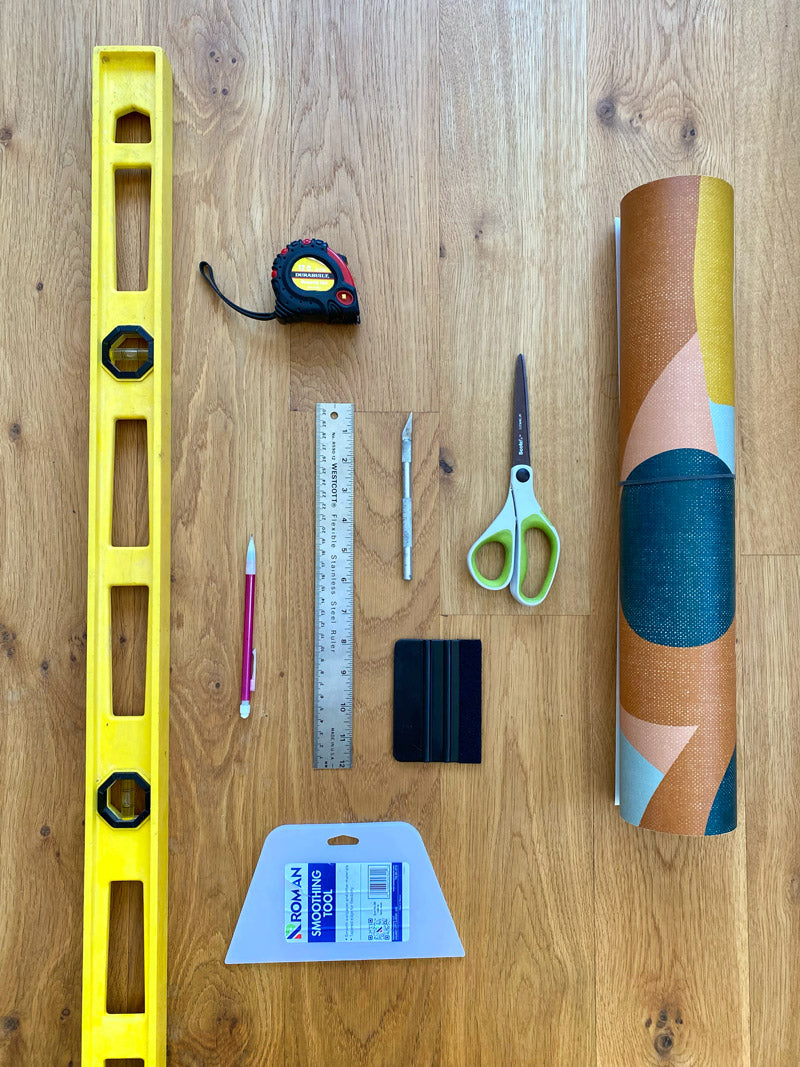
What you will need
- Peel & Stick or Luxe Peel & Stick Wallpaper
- Smoothing tool (comes with black one)
- Level
- Tape Measure
- Xacto Blade or Utility Knife
- Metal Ruler or Straight Edge
- Pencil
- Scissors
- Larger smoothing tool (optional)
Step 2
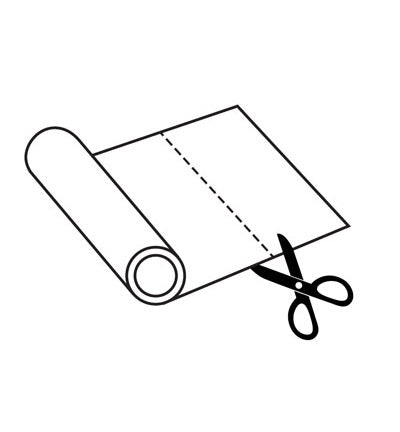
PREPARE YOUR PANELS
Unroll your wallpaper and cut on the dotted lines to separate each panel and layout the panels from left to right in numerical order to stay organized. Once your panels are laid out on the floor, check that all panels are free of damage. Double check that you have sufficient rolls to complete the job. If your print was split into multiple rolls, it is important to lay out your panels to determine where your repeats match-up and ensure you are starting with the correct roll.
Step 4
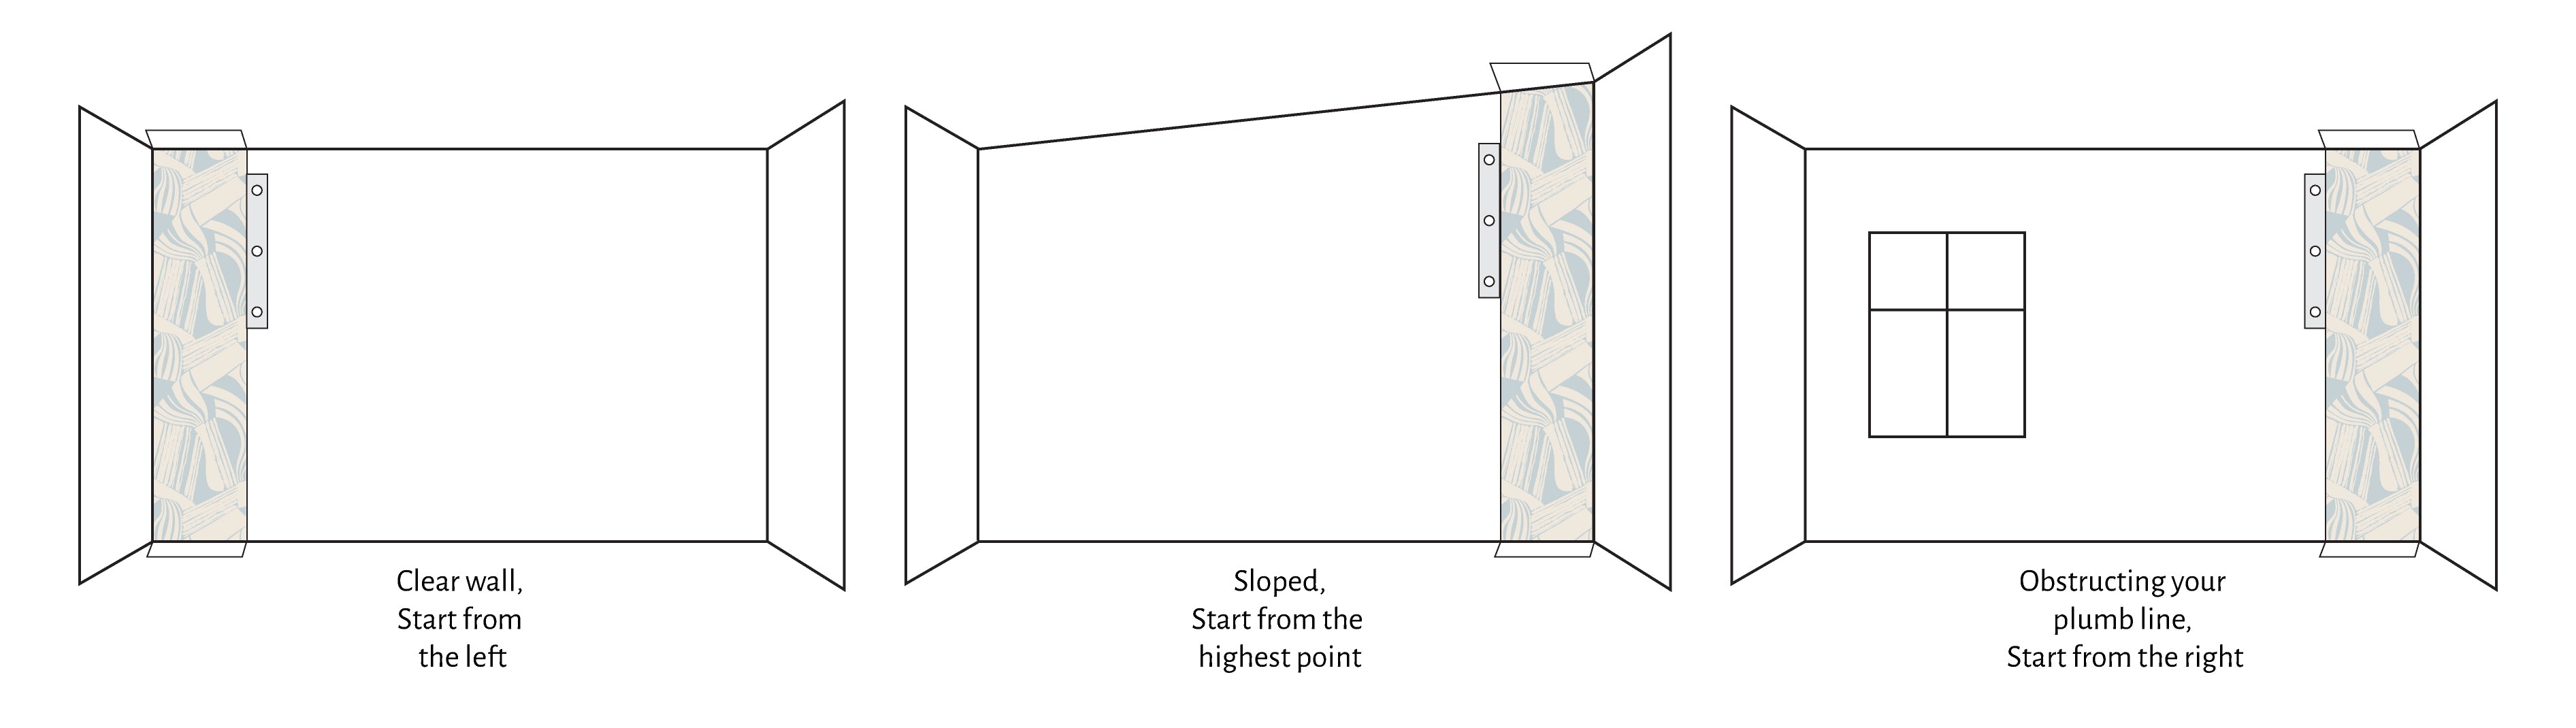
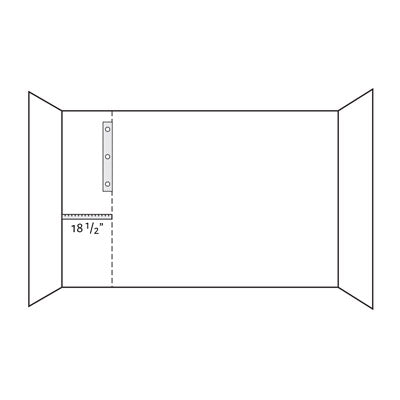
MAKE A PLUMB LINE
To ensure you get off to a great start, use a level to make a vertical plumb line 18 1/2 inches in from the corner where you will begin your installation. This plumb line will be your guide to help install your first panel perfectly! Hanging your first panel of wallpaper level and straight is key to the success of your project.
Step 6
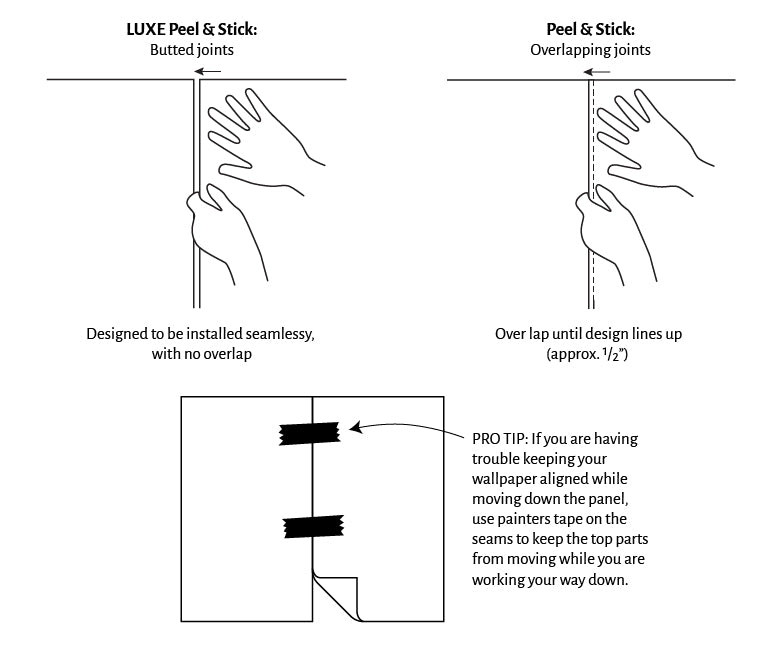
APPLY THE SECOND PANEL
Pick up your second panel of wallpaper and peel back about 18-24 inches of the backing at the top. If using the Peel & Stick material apply it so that its edge overlaps the previous strip by approximately ½ inch, visually matching the repeat. If using the LUXE Peel & Stick line it up next to your first pattern with no overlap, as the LUXE Peel and Stick is designed to butt together seamlessly. When aligning the panel be sure to use a gentle touch to prevent stretching or warping.
PRO TIP: If you are having trouble keeping your wallpaper aligned while moving down the panel, use painters tape on the seams to keep the top parts from moving while you are working your way down.
Step 7
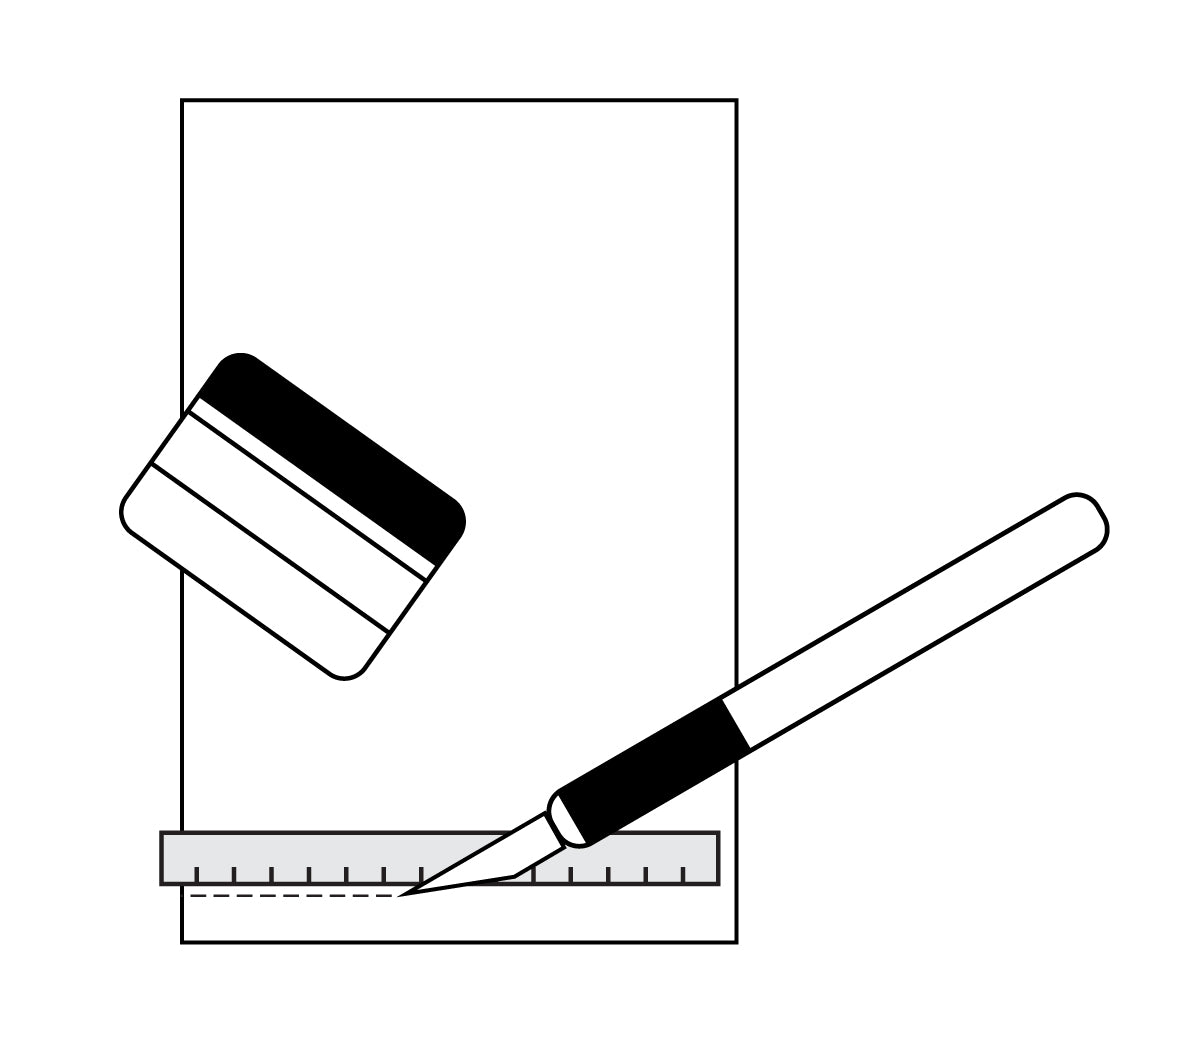
SMOOTH & CUT
Once you’ve applied all panels, go over your wall with your smoothing tool and smooth out any remaining bubbles. Then use a sharp xacto blade or utility knife with a metal ruler or straight edge tool to trim the excess at the top, bottom, left and right.
Now you're done! Stand back and admire your beautiful wall!

